How it works

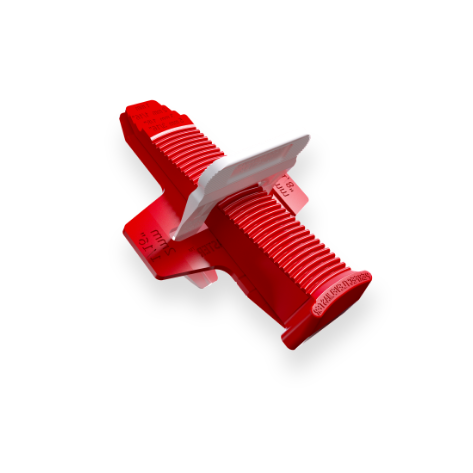
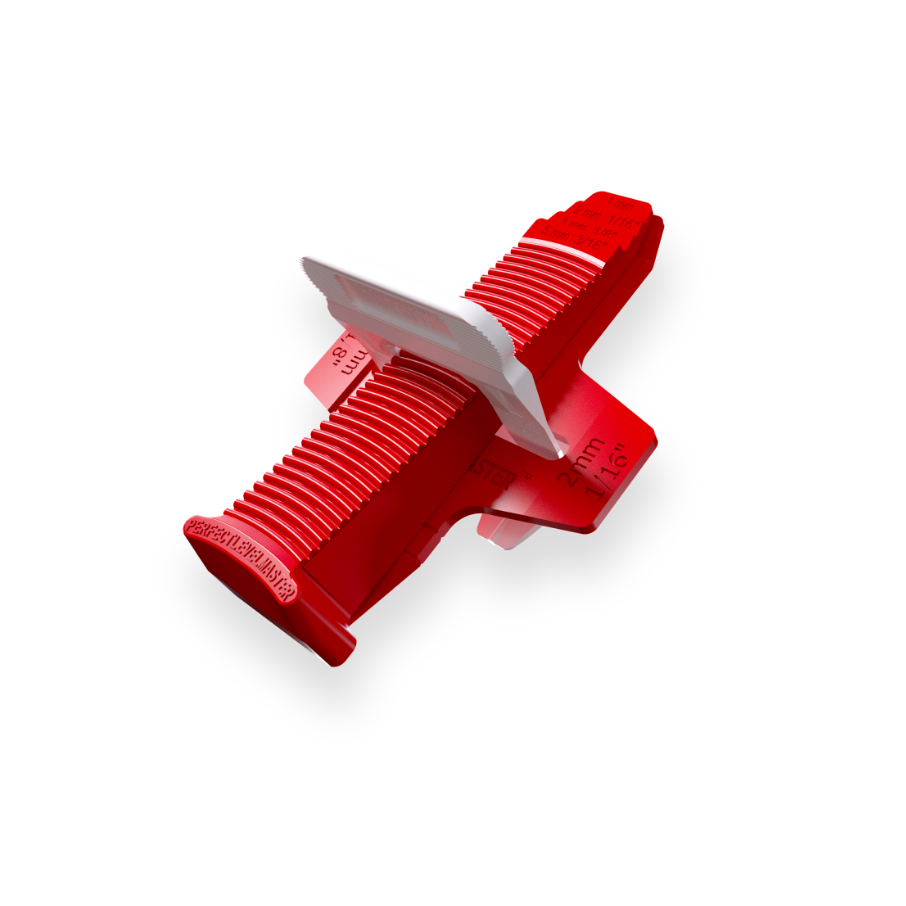
T-lock clips
Made from a highly durable plastic and available in 4 different sizes for use on various tile thicknesses. The T-Lock Clips are available in 1mm, 1.5mm, 2mm, and 3mm variants.
DESIGN & TECHNOLOGY:
The T-Lock Clips have the thinnest base in the industry, allowing for use of the smallest tooth trowels and the highest level of precision.
USAGE:
The T-Lock Clips go between your tiles and are used with the T-Lock Wedges.

T-lock Base plates
Protect delicate material such as natural stone or glass from scratching and marking during installation. Can also be used for thin tiles to increase wedge height while using taller clips, as well as be used as a grout size spacer for 0.5mm, 1mm, 2mm and 3mm.
DESIGN & TECHNOLOGY:
-
Specifically designed to work with all Perfect Level Master Clips
-
Can also double as a shim
-
Only one to have a built-in spacer in the tips

T-lock Wedges
Our Wedges have a Lifetime Warranty and are made from a highly durable plastic. The T-Lock Wedge has a unique thumb pattern to ensure comfort and eliminate fatigue throughout the installation process.
DESIGN & TECHNOLOGY:
The T-Lock Wedge is the only wedge to have a built-in spacer in the tip, making it the only multi-use wedge on the market. The T-Lock Wedge is also reusable, helping to reduce waste.
USAGE:
The T-Lock Wedge slides securely into the T-Lock Clip, creating the perfect amount of tension to create a levelled surface.
T-lock Tools
The tools you’ll want to get it done!
We’ve hand chosen a few tools to help
Make it Perfect.
The T-Lock System
Step 1
Remove the excess mortar from the edges using a trowel.
Step 2
Step 3
Step 4
Tighten, to ensure there is no variation in height of adjoining tiles
Frequently Asked Questions
Click Here to get in touch. We're active on Instagram and Facebook as we work so feel free to private message us as well.
This may be because the breaking off of the clips is not done parallel to the grout line. One should always strike the sides of the clips with a rubber mallet or safety shoes parallel to the grout line. Another possibility is the the tile work was left to dry with excess adhesive on the tile edges. This can be avoided by cleaning the edges with a putty knife when the adhesive is still fresh.
No, you can always use a smaller grout size clip and use our Tile Crosses to make up the difference. By using this trick you can reuse more of your material and it offers the installer greater flexibility.
Yes, the T-Lock system can be applied to any surface.
It is important to pay attention to the direction that one is placing the wedges. For best results, insert the red wedge towards the already installed tiles.
100% - Perfect Level Master is great for Indoor & Outdoor usage. Our Large Clip is designed to be a great fit for Outdoor Tile installations.
Join our newsletter!
Get updates on upcoming sales, installation tips, promotions and many more exclusive perks!